Technical Support for ASEBA® Software Products

Administrative Housekeeping Before Using ASEBA-Web, ASEBA-PC or ASEBA-Network
4 min read
There are a few procedures that administrators should do, so that the process of scoring behavioral assessment forms goes smoothly for all users.
First: Administrators should add all users to the program, this includes clinicians as well as administrative staff or assistants who may need to use the program.
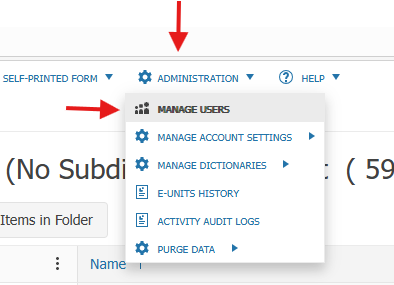
How to add users: Please click on ADMINISTRATION tab, MANAGE USERS
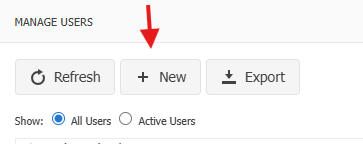
Click on New:
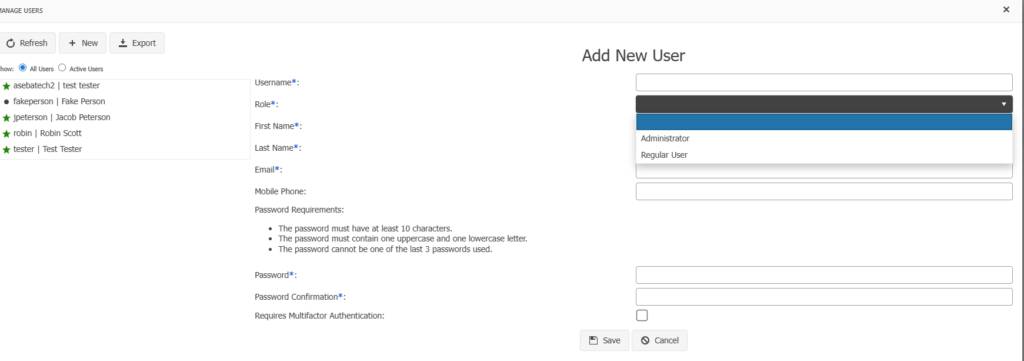
Fill in the information on the new user: Username (create one), Role: choose Administrator or Regular User. We suggest at least 2 administrators per account, Last Name, Email address, Mobile phone, Password, Password Confirmation (create one) and if desired check off MFA. Click Save.
- Please be advised that when an Administrator creates a user, or resets a password for a user, the program DOES NOT send an email. A reset password email is only sent if the user clicks on the “I forgot my password” link on the login page and sends a reset password to themselves. Please inform your users of the login information created, and what the new password is, should the administrator reset the user’s password.
- Please do not create a generic password for all users in your organization. Users logged in under the same username will create issues within ASEBA programs. Each user needs their own individual login, so they can reset their own passwords. Passwords expire every year.
Once the user has been created, the user will show up in the left-hand column. When the user is highlighted, the user information is shown, as well as the menu at the top of the page: Enable/Disable, Edit, Set Role, Expire Password, Multifactor Authentication and Set Password. Also, an administrator can export the entire list of users by clicking on the Export tab.
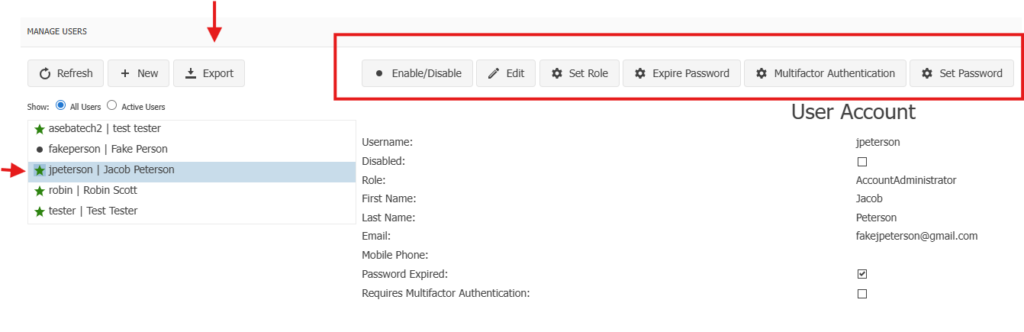
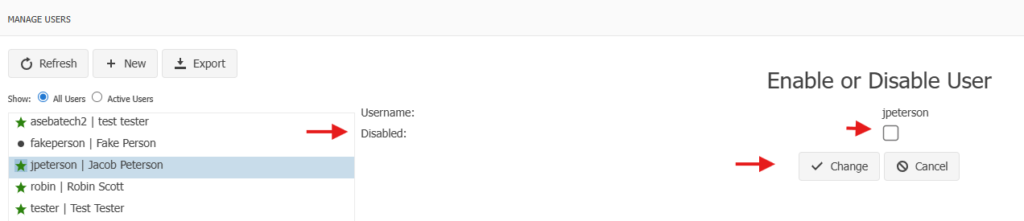
The Enable/Disable tab gives the administrator the option to enable or disable any user: Check the box and click Change to disable. Uncheck the box and click Change to enable.
The Edit tab will allow administrators to edit the First Name, Last Name, Email address and Mobile phone. Click Save.

The Set Role tab will allow administators to change the role of a user from Regular User to Administrator and vice versa.

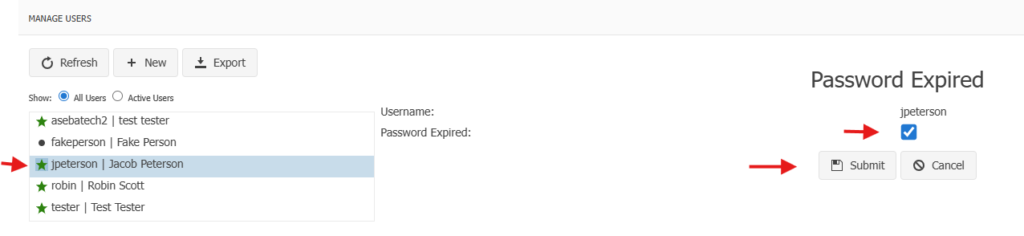
The Password Expired tab is checked by default. When this tab is checked, the user will be forced to reset their password once they log in with the credentials given to them by the administrator. If this box is unchecked, the user will not be forced to reset their password and can log in with the credentials given to them by the administrator.
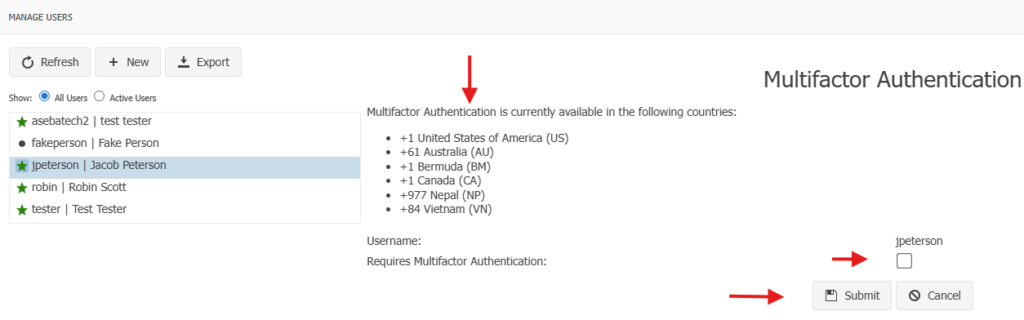
The Multifactor Authentication tab is an option that administrators can choose to activate or not. To activate MFA please check the Requires Multifactor Authentication box and click Submit. Only the countries on the list below can use MFA at this time.
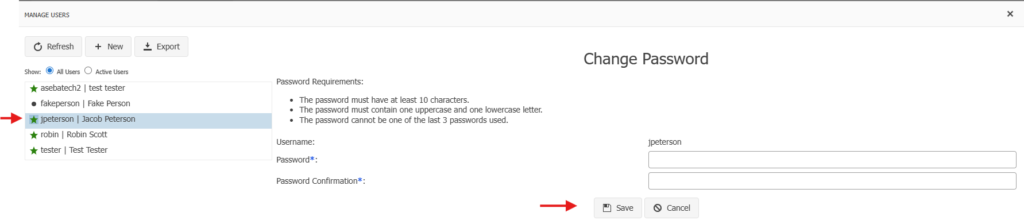
The Reset Password tab allows administrators to change (or reset) a user’s password. Create a new password and click Save. Again, please let the user know what the new password is.
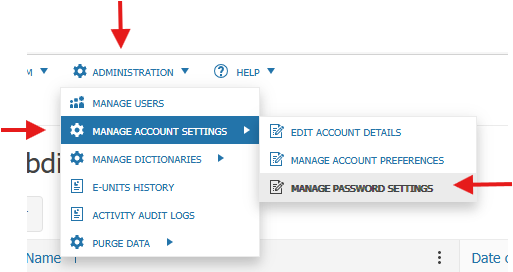
Second: Password settings have a default setting, but these settings can be changed. Click on ADMINISTRATION, MANAGE ACCOUNT SETTINGS, MANAGE PASSWORD SETTINGS
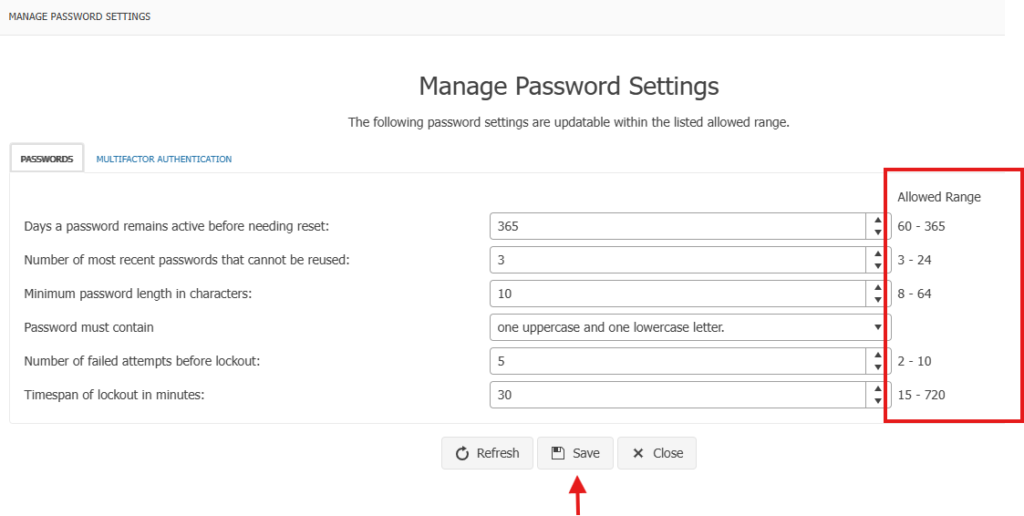
Any of the options below can be changed within the ranges to the right. Click Save. Also, there is an option to activate Multifactor Authentication from this page as well.
Third: Clinicians need to be added to the Clinician drop-down list, so the list is available on the Add Form window. Agencies and Schools and customized drop-down lists can be created by the same process.
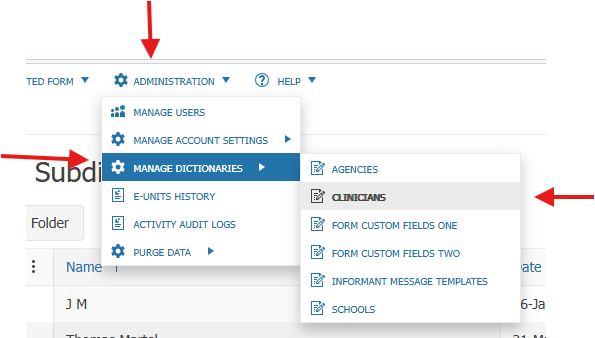
Click on ADMINISTRATION, MANAGE DICTIONARIES, CLINICIANS (Click on AGENCIES, SCHOOLS, or the FORM CUSTOM FIELDS ONE OR TWO to set up drop-down lists for those options. )
Click New.

Fill in the clinician’s information. Click Save.

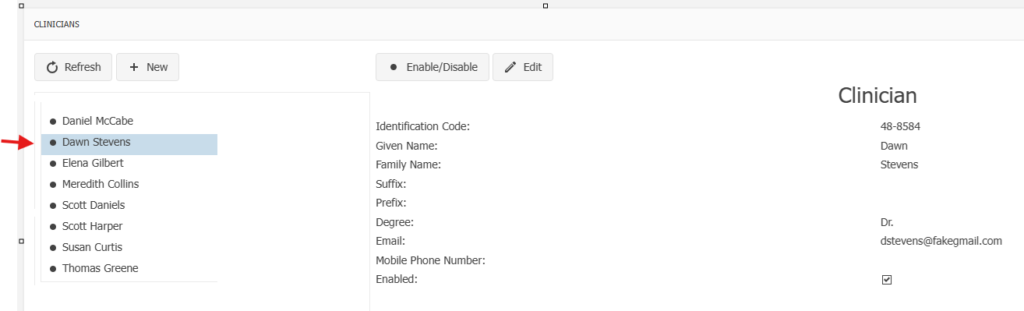
Once the clinician is created, the clinician will be added to the left column. All the clinician’s information will be listed on the right. Administrators can Enable/Disable and Edit any clinician.
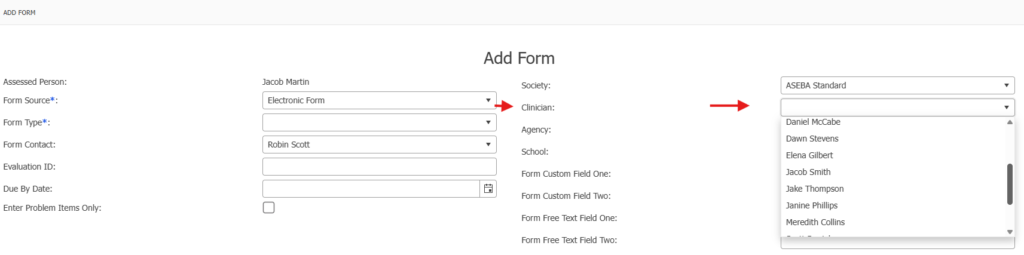
Once all the clinicians are added to the list, they will appear in the drop-down list in the Add Form window:
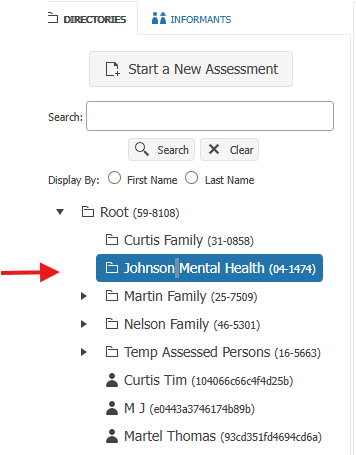
Last: To better organize your Assessed Persons in the left-hand column, it is suggested that directories be created ahead of time. Directories can be created, for example, different clinicians, organizations, buildings, departments, and families,
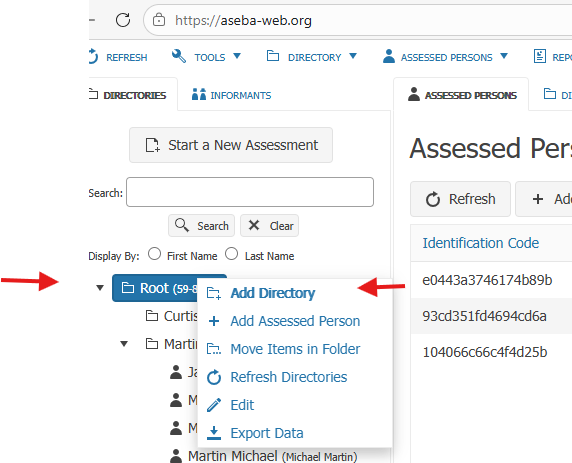
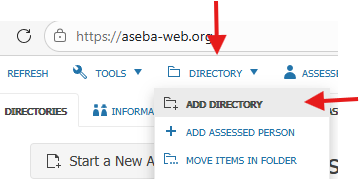
Click on the Root directory to highlight it; right click and choose Add Directory or click on DIRECTORY at the top of the page and choose Add Directory.
Fill in the directory name and click Save.
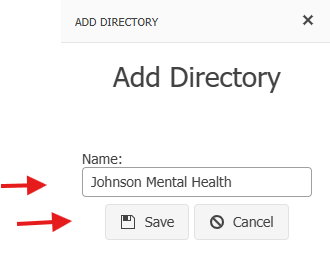
The directory will be created in the left column.
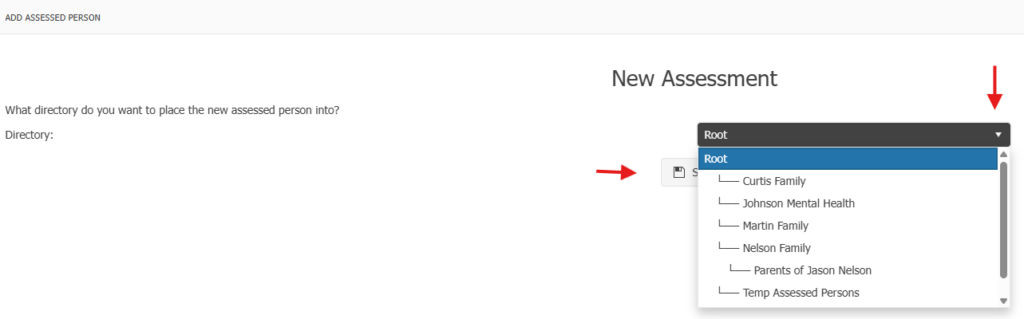
When users are working through the Start a New Assessment process, they will be asked where they want the Assessed Person to be placed and now will have directory options: