Technical Support for ASEBA® Software Products
How To Add a Form (with and without the Start a New Assessment wizard)?
2 min read
**Please note, this will be the same for ASEBA-PC , ASEBA-Network, and ASEBA-Web.**
Log into ASEBA-PC, ASEBA-Network or ASEBA-Web program, in upper left hand corner please click on “Start a New Assessment“. This wizard will add an Assessed Person, add a form, and (for ASEBA-Web), send the form electronically to an informant.
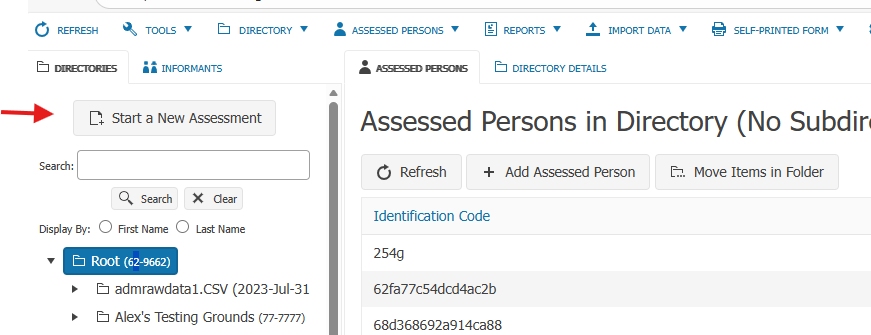
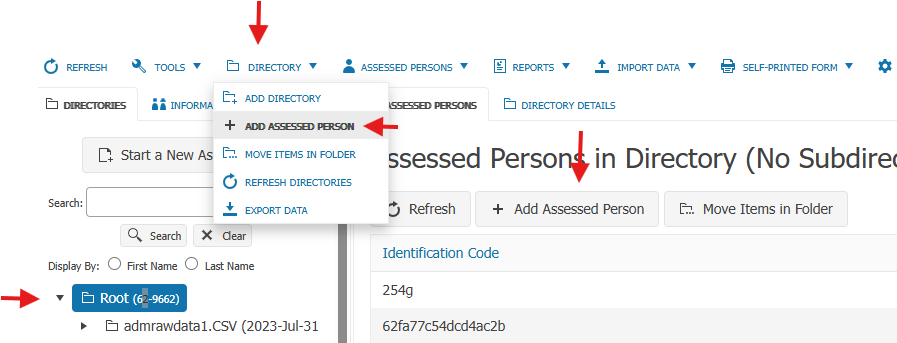
IF CHOOSING NOT TO USE the “Start a New Assessment” wizard, please first add an Assessed Person by clicking on the Root directory to highlight it (or the directory of choice), then click on DIRECTORY tab, and select ADD ASSESSED PERSON, or RIGHT click on the directory and choose Add Assessed Person, or click on Add Assessed Person in right column:
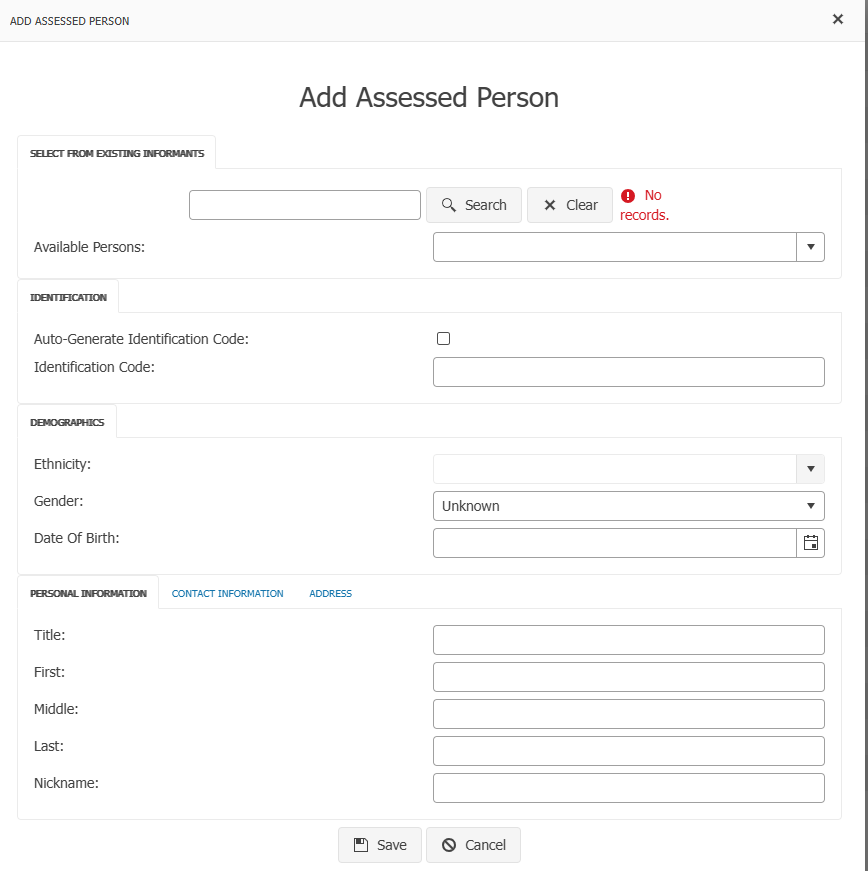
Fill out the information on the Assessed Person:
- To SELECT FROM EXISTING INFORMANTS: If looking to add and Assessed Person, who has already been an Informant, please type their name in the search box, click Search and then the name will be available to choose in the drop down list.
Select Auto-Generate Identification code (an automatic alphanumeric code will be created) or Identification Code (names, initials, numbers, etc.) Choose Ethnicity, Gender and Date of Birth. Fill in First, Middle, and Last Name. Contact Information and Address information is optional. Click Save. The Assessed Person will be created in the left hand column under the DIRECTORIES tab.
- If the Start New Assessment wizard was used and the Assessed Person has been already created, a form already added, but additional forms need to be added to the Assessed Person, please follow the directions below.
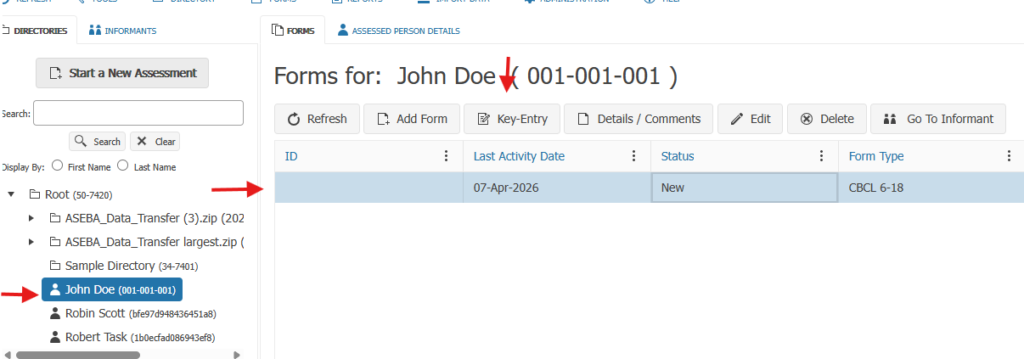
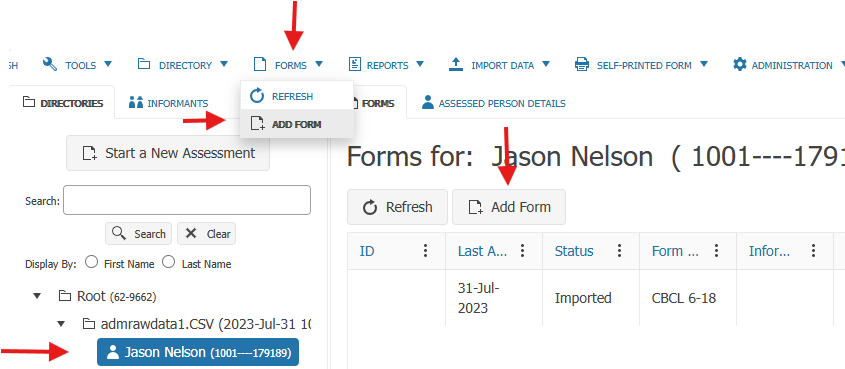
To add a form, please click on the Assessed Person to highlight them, then click on the FORMS tab and select ADD FORM, or click on the Add Form tab in the right hand column.
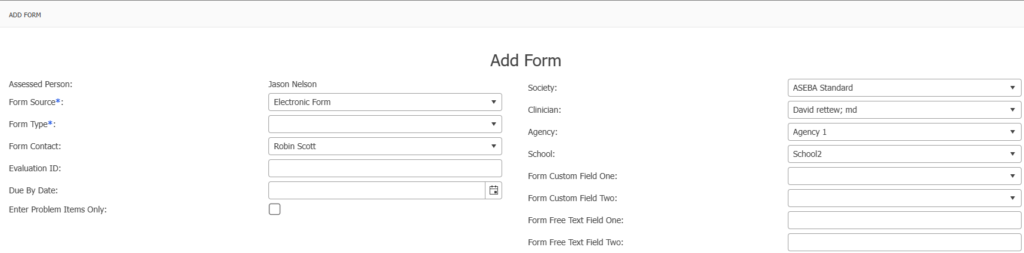
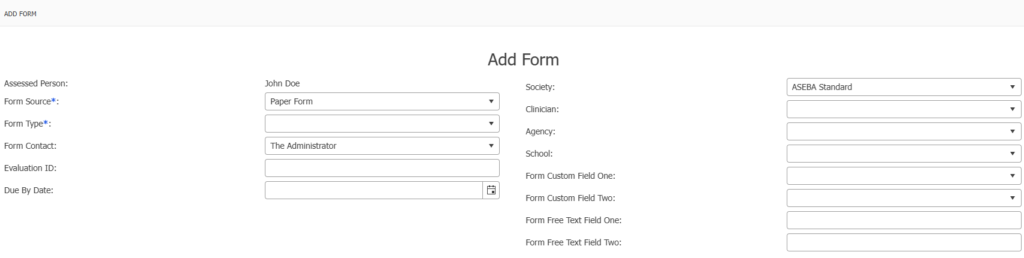
Fill out the form: The example below is from ASEBA-Web and ASEBA-PC/ASEBA-Network.
Select the Form Source: (choices of Electronic Form, Paper Form (a paper form previously filled out by an informant), or Self-Printed Form (a blank form to be printed). Select the Form Type: For example, Child Behavior Checklist (CBCL), Teacher Report Form (TRF). Form Contact: will autofill with the name of the user that is signed in for ASEBA-Web and The Administrator for ASEBA-PC. Evaluation ID: is used by hospitals for electronic medical records. Due By Date: is optional. Enter Problem Items only: check this box if the Informant is to only fill out Problem Items and not the whole form. Society: default to ASEBA Standard. If a different society is needed, use the drop-down arrow to select another society. Clinician: Agency, School, User Defined 1 and 2 and User Defined Field 1 and 2 are all optional and need to be created by administrators ahead of time for a drop-down list (How to add or disable clinicians to the drop-down list: https://answers.aseba.org/post/how-to-add-and-remove-clinicians-in-the-drop-down-list-in-aseba-web-administrators-only/ )
Click Next.
ASEBA-Web:
ASEBA-PC /ASEBA-Network:
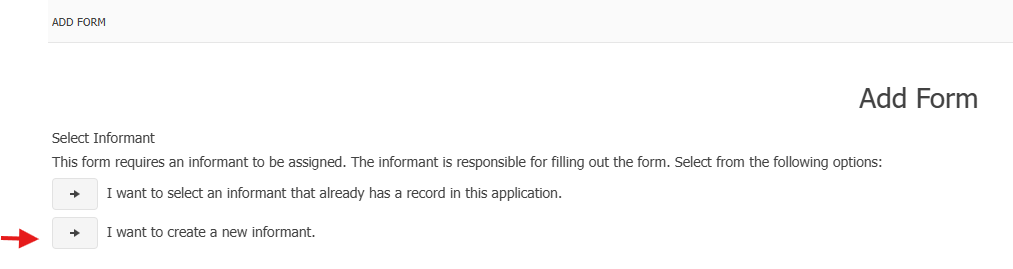
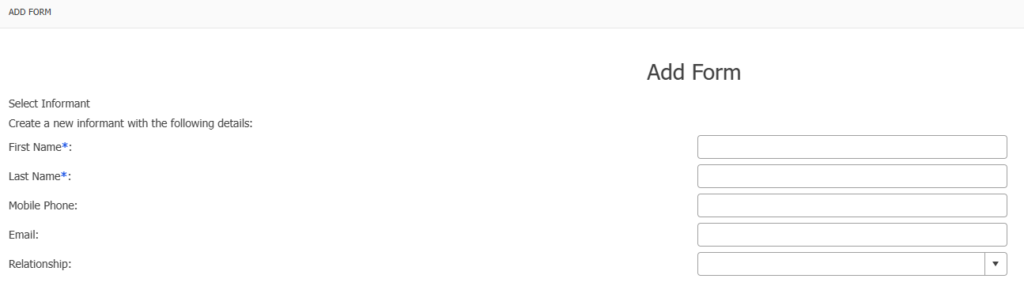
Add an Informant: For a new informant, click “I want to create a new informant.”
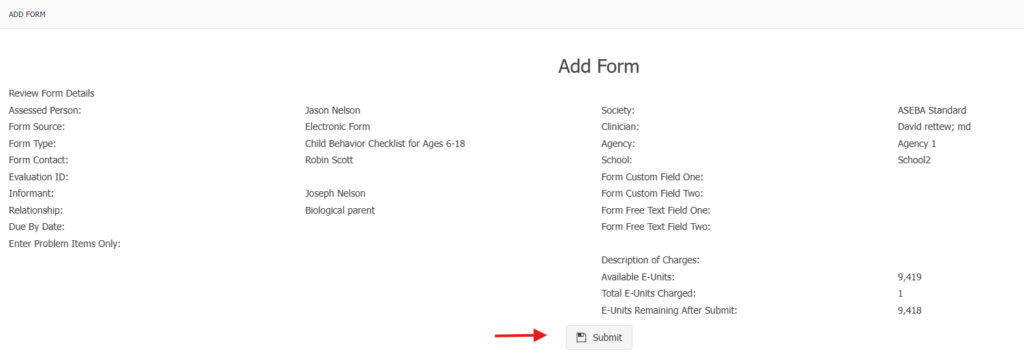
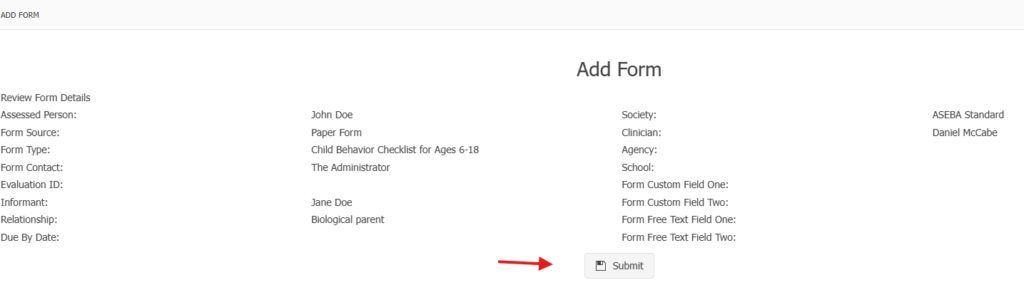
Review Form Details. Click Submit.
ASEBA-Web:
ASEBA-PC/ASEBA-Network:
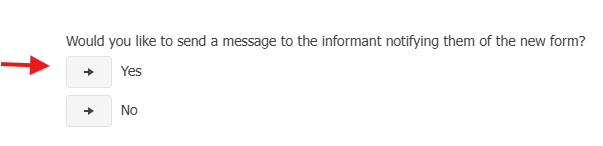
With ASEBA-Web, the program will ask if the user wants to send the form electronically to the informant. Click Yes.
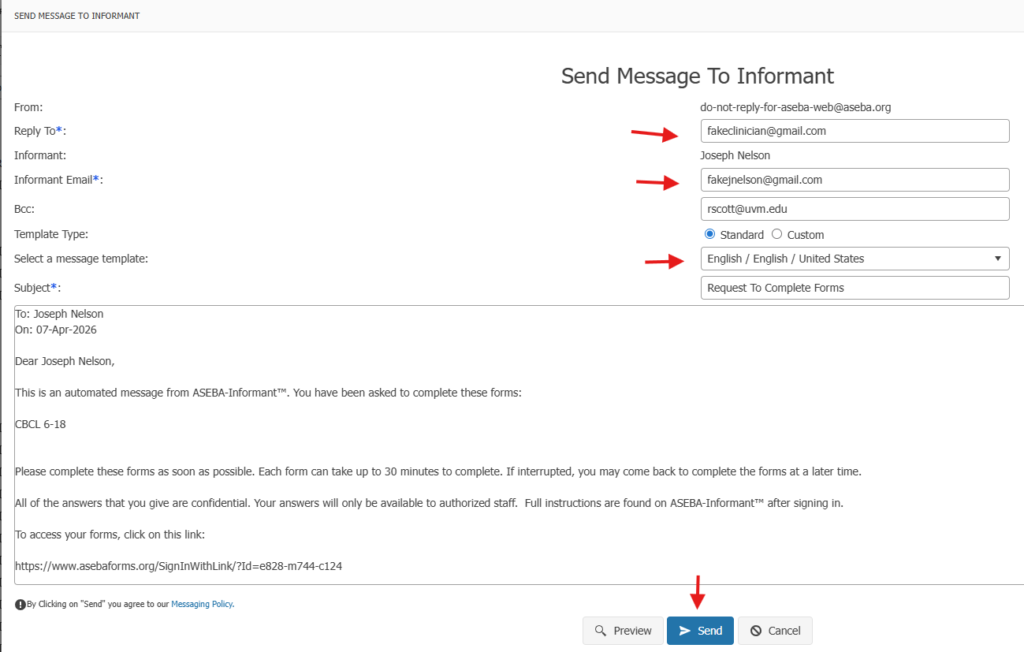
Type in the clinician’s email (if not defaulted) and the Informant’s email, change the language if needed, and click Send.
ASEBA-PC/ASEBA-Network:
Please click on the Assessed Person to highlight them, click on the form that was newly created and click on the Key-Entry tab to open the form and enter data.