Technical Support for ASEBA® Software Products

How To Import Data into ASEBA-Web
1 min read
How To Import Data (File Transfer or .csv file) into ASEBA-Web from ASEBA-Web, ASEBA-PC or ASEBA-Network.
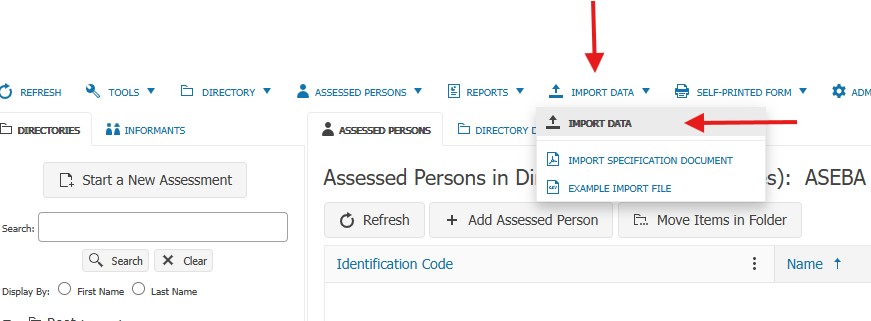
Select IMPORT DATA tab, then IMPORT DATA tab again.

Select Data Transfer File: Click Next.

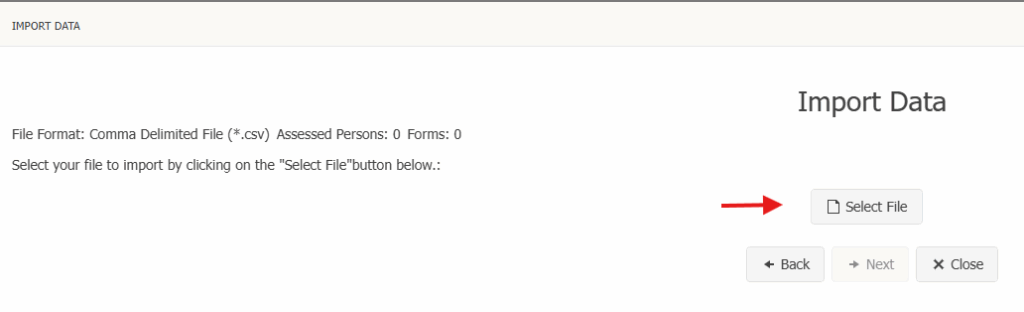
Click on SELECT FILE and browse for the file to import: Click Next.
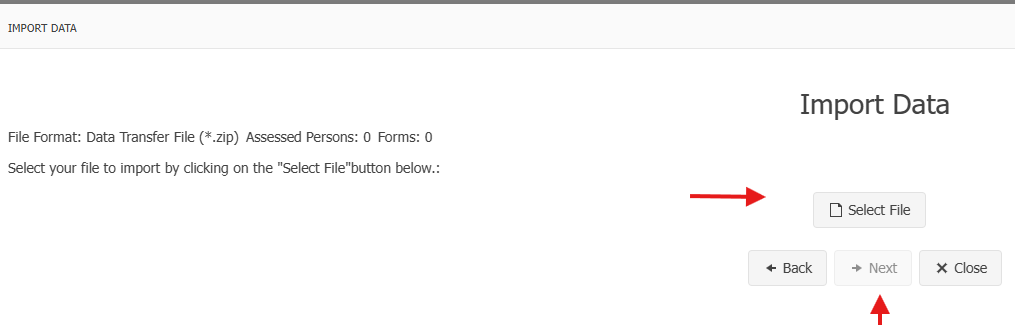
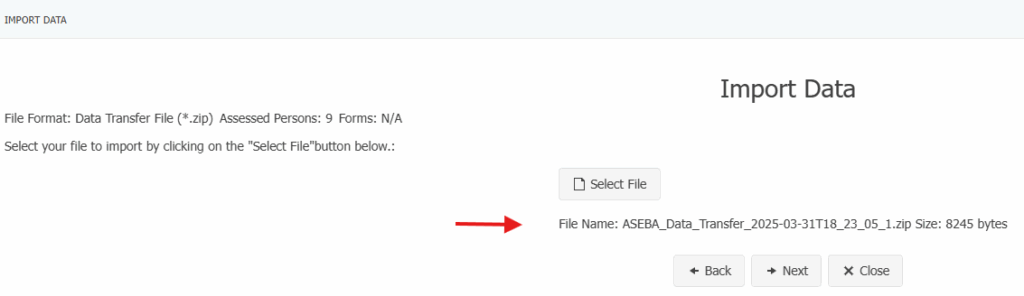
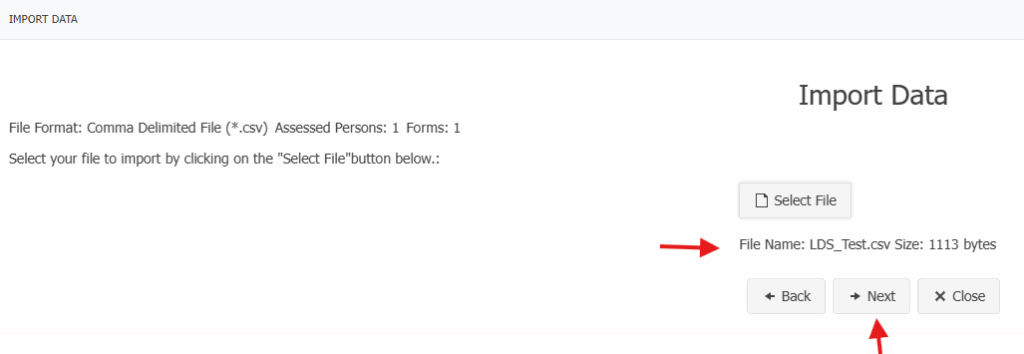
The name of the file will appear once selected. Click Next.
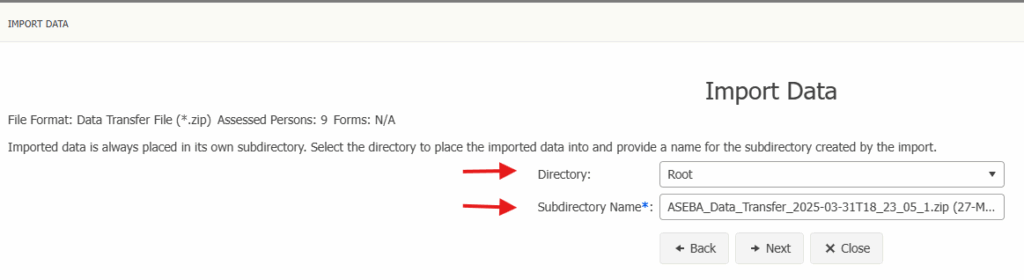
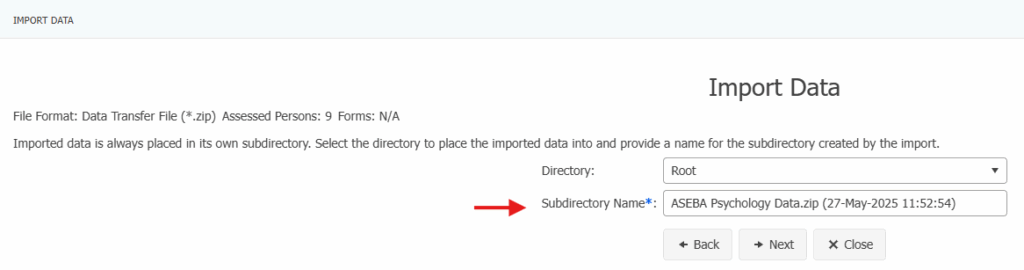
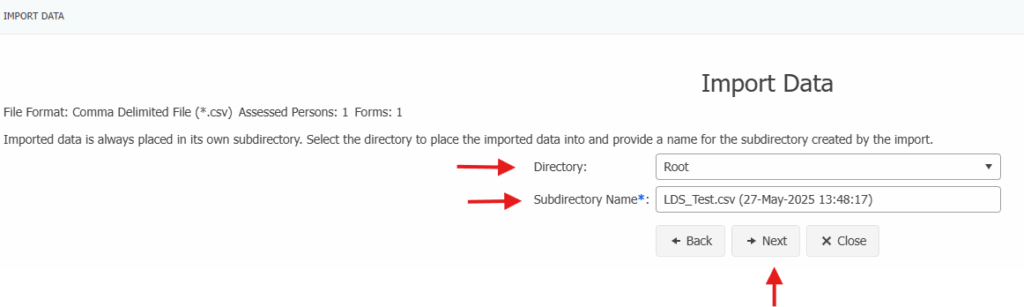
Select the Directory to import the file. Rename the file if desired (Subdirectory Name).
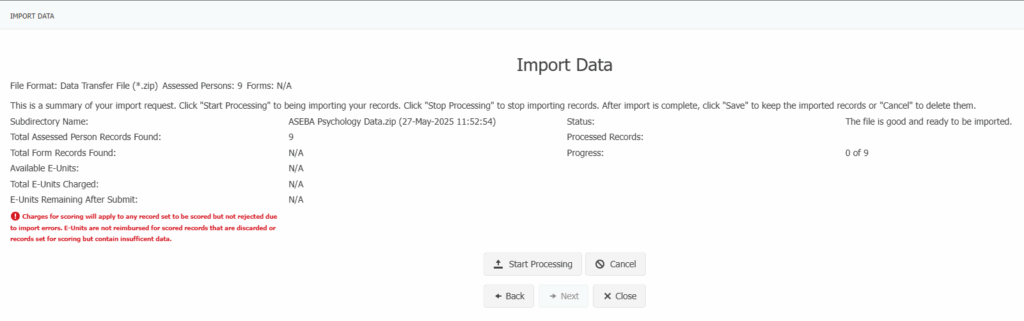
Select Start Processing.
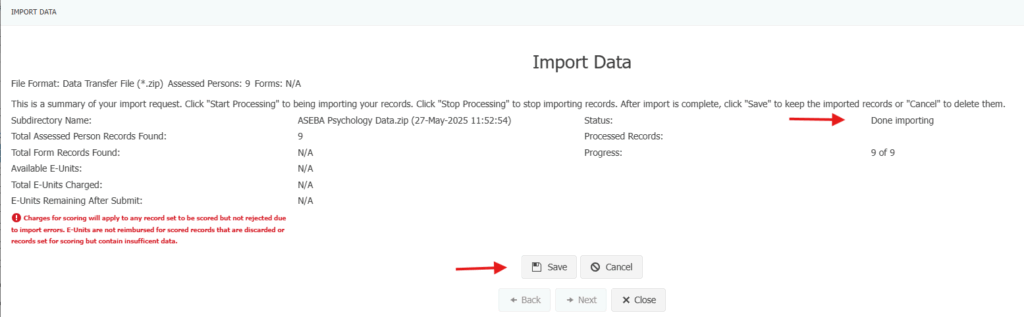
The program will say Done Importing. Click SAVE.
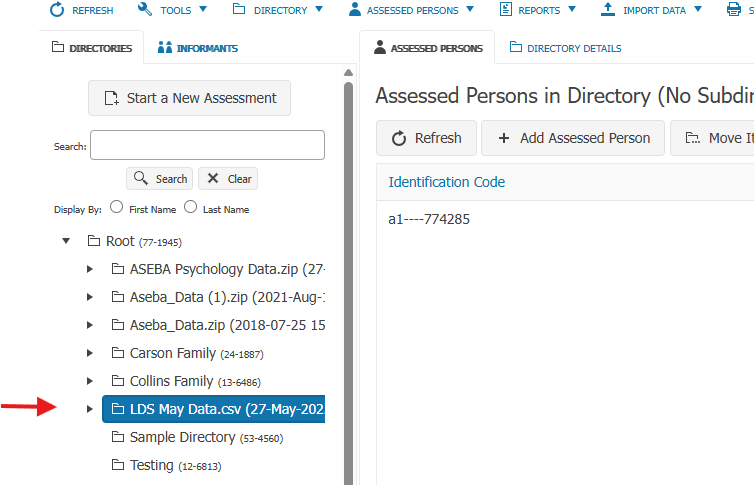
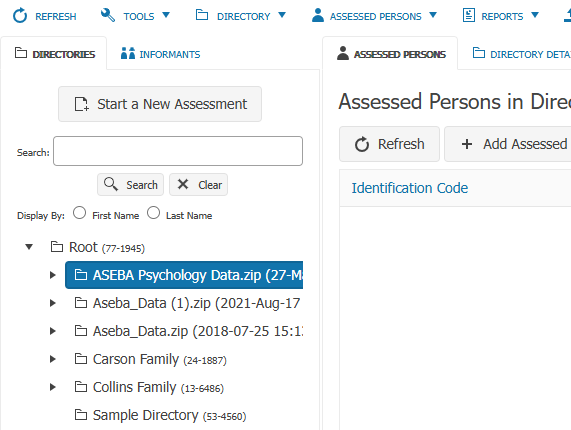
The data file will import with the name ASEBA_Data_Transfer_(with the Date and Time).zip or with the name given to the import. Please expand the arrow to see all clients and their forms.
To Import .csv files, please follow the directions below:
Select Comma Delimited File (.csv): Click Next

Select the file to import: The file name will appear once selected.
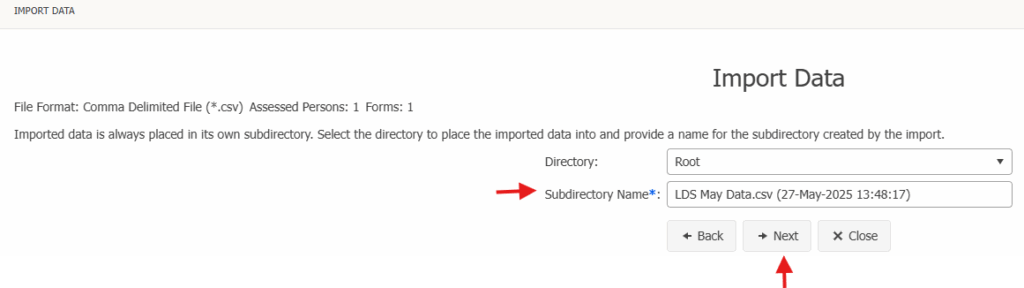
Select the Directory to import the file. Rename the file is desired (Subdirectory Name). Click Next.
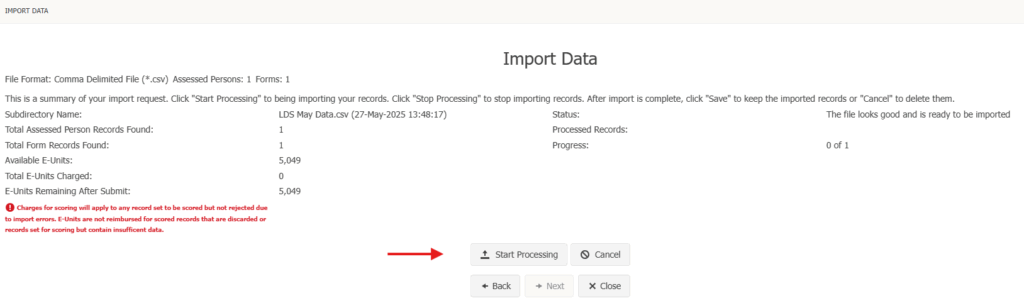
Select Start Processing. Click Save.
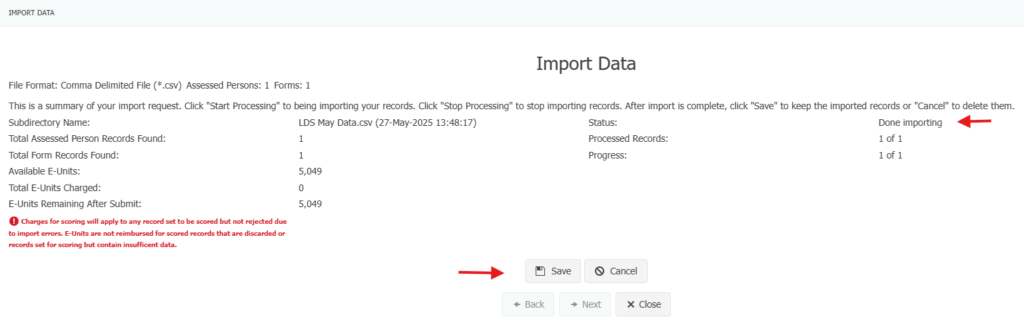
The program will say Done Importing. Click SAVE.
The data file will import with the name given to the file (with the Date and Time). Please expand the arrow to see all clients and their forms.